Monday, October 24, 2011

Design Team Monday!!

Happy Monday all!!!  The Design Team is back with another round of projects for you!!

This week, we are using the below piece as inspiration....
____________________________________________

Michele

I really enjoyed doing this layout. Obviously what hit me was the negative letters effect and I wanted to try this for so long, this was the time!!


Papers: My Mind's Eye - Lost & Found Two Collection (Blush)
Inks: Brown Pigment ink pen, Chestnut Cat's Eye chalk ink and Chocolate Cherry Glimmer Mist
Ornaments: Glitter Chipboards, brads, buttons, paper embellies are ALL from My Mind's Eye - Lost & Found Two Collection, and there is also a small piece of polka-dotted miscellaneous ribbon and 4 plain brads
Tools: Crafter's Workshop Template - Branches 
_________________________

Tracey

I went around and around in my head with this one. I just could not get past the grid thing. So, that is what I did with this one. I figured it was my brain trying to tell me something.


Supplies:
My Mind's Eye Lost & Found Two Collection (Breeze)
Distress Ink (Walnut Stain) 
____________________________

Virginia

I played around with the design a bit and leveraged a chipboard package as a sort of mask for this layout to mimic the colourful design of the inspiration piece:


Supply list:
My Mind's Eye - Lost and Found 2, Rosy collection
Maya Road journalling pieces
Basic Grey Letter stickers
Basic Grey Brad
Prima flower jewel 
___________________________

Julie
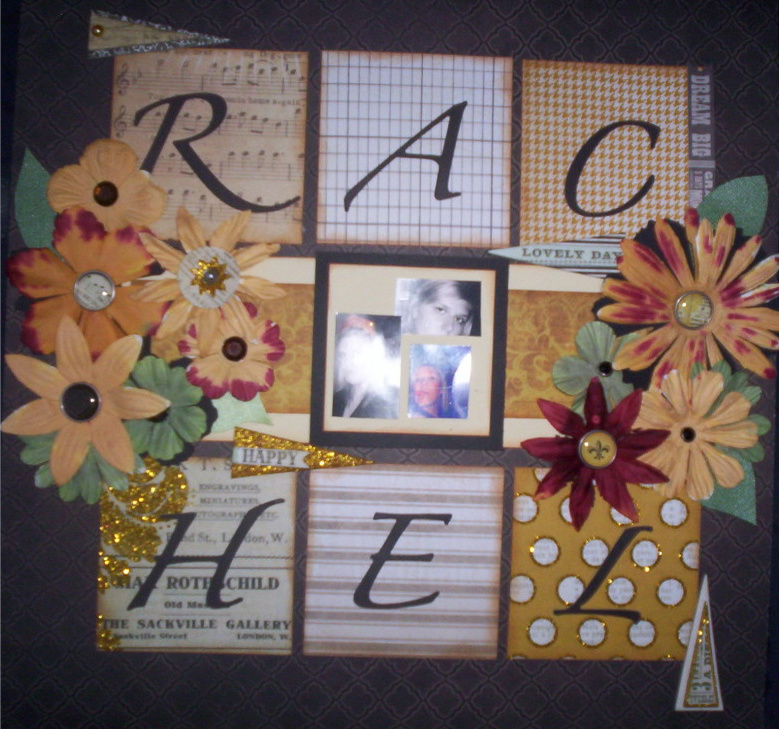

Products used:
My Minds Eye Lost and Found 2 paper collection
My Minds Eye Lost and Found 2 embellishments
Prima flowers coloured with Ranger Ink Stains
Misc. cardstock and gems

Saturday, October 22, 2011

Inspiration from the Blogosphere!

Today's project is perfect to share with the trick-or-treaters that will soon be knocking at our doors!!

Of course, you can easily adapt it for any occasion as well!

Treat Boxes

By Virginia Nebel

(Taken with permission from the Scrapbook & Cards Today blog)

Are you ready for Halloween, are the decorations up, the costume preparations underway, the candies purchased? I think it is safe to say most kids love this tradition and as a paper crafter I love to play with funky bright colours like purple, orange, and green-- add in a spooky goblin or two and I’m back to being a kid in a candy store (or shall I say a kid in a craft room LOL).


I love inter-active projects and this spooky bowlful of treats invites you to pick up a treat box revealing Halloween memories on the back of the box. Both fun and functional, these treat boxes are large enough to hold real treats too. This project is really easy-peasy, here are the steps:

1.You will need a 4 x 12 inch piece cardstock. Score in the middle lengthwise at 6 inches. Rotate and notch along the 4 inch at the 2 inches (the halfway point). I have marked it in pencil in the photo. Repeat on the opposite end.


2. Line up the notch and the centre score-line. Score to connect the two points. Repeat for all sides and you should end up with a diamond shape scored out (in the photo I have marked the score lines lightly with a pencil for a better visual).


3. Fold along the diagonal lines, apply adhesive along two opposite edges. (Optional: place the treats in the centre). Fold up the box and press the sides together. You have just made a treat box. Punch a hole through the the top with a cropadile for a fun ribbon accent.


4. Have fun to decorating the one side with all your ghoulish embellies and place photos/journaling on the other side. Group them in a large bowl and let your kids rummage with delight remembering past Halloweens.


5. Here are a few spooky boxes I made, it’s hard to choose my favourite…I think I like the one with the ghost holding a pumpkin bag-so cute!


Supplies: Bazzill, WR Memory Keepers pattern paper, K&Co embellishments.

Hope you enjoyed this project, happy trick or treating!

Thursday, October 20, 2011

Online Crop fun!!!


The Harvest Fun Online Crop has BEGUN!!!!

Pop on over to the forum to check out all of the fun!!

I just thought I would share the first fabulous project loaded up.  Michele posted a fabulous Make & Take using a template from Martha Stewart.  You can see the details HERE.

Now, here is our first participant version created by Bev Code....


Be sure to come by the forum to check out the challenges and earn a chance at prizes!


Tuesday, October 18, 2011

Kit of the Week!

A new week means a new fabulous "Quic-Kit" from the ladies of Fruit & Nut!!


Get yours while quantities last!


Monday, October 17, 2011

Design Team Monday!

The Design Team is back for another reveal using the gorgeous new Lost & Found Two collections from My Mind's Eye!

Stamping is our technique for this month!! There is so much you can do with stamps and there are so many incredible stamps out there.

A lot of people associate stamps with cardmaking but we are here to show you that you can add the perfect touches to your layouts with them as well!
___________________________________________

Michele

I used Plum Cat's Eye Chalk ink with my Stamp (My Mind's Eye - Lost & Found Two Collection) and I used it repetitively to create more texture and a bit of a frame for the vertical papers (see the word «BEAUTIFUL» here and there on the layout). It's a simple technique that can be quite efficient. You could create an entire frame on the background this way or even around your photo(s).

You can use any colour too. The colour you choose will either make it stand out or be more subtle on your layout.


Papers: My Mind's Eye - Lost & Found Two Collection (Blush)
Inks: Plum Cat's Eye chalk ink and brown and white pens for the hand written text.
Ornaments: Glitter Chipboards, brads, buttons, paper banners and lace ribbon as well as a beautiful frame transparency (over the photo), are ALL from My Mind's Eye - Lost & Found Two Collection, including the stamp!
________________________________

Tracey


The first technique I used was stamping then heat embossing on a button. You have to be careful when stamping because it is very easy to slide on a button.

Tip: When heat embossing, make sure you put a heat resistant tray or trivet down under your button. I learned that the hard way and have the scorch marks in my carpet to prove it. 
 

The second technique is combining stamping & die-cutting. I stamped this banner image then die cut it out.


For the third technique I stamped the heart image and then covered it in Glossy Accents.


Supplies:
My Mind's Eye Lost & Found Two Collection (Breeze)
Fancy Pants Filter Flower Embellishments
Glossy Accents
Seafoam White Embossing Powder
MFT Die-namics
Circle & Scalloped Circle Punches
__________________________________________

Virginia

Here is my take:


I used the My Minds Eye, Lost and Found 2 Rosy stamps and also Studio Calico letter stamps. I am NOT a stamper - it scares me! So for this challenge I stamped on white cardstock then trimmed out the shapes and incorporated into my layout:


You read it right - we're having another baby!

Supplies here are all My Minds Eye Lost and Found 2 Rosy with the exception of the ribbon which was leftover from a gift and the kraft which was a re-used paper bag. 
____________________________________

Julie

I used my stamps to make a border around the 12x12 edge of the page and also to make several embossed flowers on the page.


Products used:
My Mind's Eye Lost and Found 2 papers
My Mind's Eye Lost and Found 2 brads and stamps
Prima flowers coloured with Ranger Ink Stains
Miscellaneous gems


Saturday, October 15, 2011

Inspiration from the Blogosphere!

There is so much amazing inspiration out there in the blogosphere that sometimes I just wish I could share it all!

I hope you enjoy today's project!

Apple Box Tutorial


What you will need (what I used in parenthesis):

Patterned paper of your choice (Little Yellow Bicycle "Head of the Class")
Scoring device (Scor-Pal)
Double sided tape (Scor-Tape)
foam tape (Scotch)
scissors (Tim Holtz)

Optional--
Accessories to decorate it. (SRM stickers, Cricut cartridge-Plantin Schoolbook, Twinery ribbon-Cappuccino)


Step 1: Start with a piece of patterned paper that is 6" by 6" and score at the 2" and 4" marks. Turn paper once and score again at same measurements.
 

Your paper should look like this:
 

Step 2: Cut the flaps on opposite sides like shown.
Note- You should be making four cuts, that's it!


Step 3: Apply double sided tape to the flaps as shown.


Step 4: Remove adhesive liner and fold up one side to adhere over the middle section and press.
 

Step 5: Do the same with the other side.
 

Step 6: Repeat on the other side so that you end up with this.
 

Step 7: Cut a strip for the handle whatever thickness you would like. I made mine .5".
 

Step 8: Apply double stick tape to the ends of the handle and adhere to the inside of box.
 

The box is finished. Decorate as you wish! I am including the directions to decorate it with the same design I posted on Monday for those who asked for it.

Using the Plantin Schoolbook cartridge (Cricut), I cut two apple designs (3") and one shadow for the apple. I used the red for the top part on this example, stitching it over the blue base. I used a chipboard pencil (Little Yellow Bicycle) and added an SRM sticker "thanks" over it.
 

I tied the pencil to the apple using some Twinery ribbon (Cappuccino).
 

I used some foam mounting tape to attach the apple to the front of the box and then I used some dimensional stickers (Little Yellow Bicycle) to place over the handle edges.
 

Here is the finished product:


Thursday, October 13, 2011

DT Special Assignment Day!


Colour Inspiration/Using Your Stash

By Virginia

I am not one who can easily pull colours out of the photos I'm scrapping to build my base of supplies - it's just not the way my brain works.

For this layout I pulled the colour scheme from the actual event that the photo was taken at - my sister in law's wedding colours were bright pink and black and white so I used those colours for this layout:


This was also a different approach for me because normally I want to play with my newest supplies so I just kind of build my layout around that but for this because I had a specific colour scheme in mind I was able to root through my stash to find lots of old product that I'd forgotten about that worked perfectly on this layout.

The next time you're stuck for where to start try starting with a colour palette before you pick your supplies - I guarantee you'll end up finding a few things in your stash you had forgotten about.