Showing posts with label Scrapbook and Cards Today. Show all posts

Saturday, June 23, 2012

Now available...........

Summer is here and so is the new issue of

Come and get your FREE copy when you make a purchase!


Tuesday, May 15, 2012

Inspiration from the Blogosphere!

I came across this Spider Rose tutorial over on the Scrapbook & Cards Today blog and it is too good not to share here!!


Spider Rose Tutorial

By Becky Fleck


To begin, you will need some basic supplies:
t-shirt, patterned paper, cardstock, chipboard, circle punch, baker’s twine, button, chipboard sticker, wet and dry adhesive, foam adhesive, tape


Before we create the flower, I wanted to mention a couple of things about the type of fabric you use. The t-shirt that I upcycled happened to be an interlocking weave, so it was quite stretchy in all directions. This technique will work great with 100% cotton, but you may need more thin strips of fabric to finish the rose. I liked the interlocking fabric because when you stretch out the strip, it crinkles and frays:


To start, punch out a circle from a piece of chipboard. For this example, my circle is 1¾”. Punch a small circle in the center. Mark five points around the perimeter of the circle with a pen.
 

Cut a 12” length of baker’s twine. Slip one end into the center hole and tape it off on the back. Wrap the twine in and out of the center hole, running the “spokes” up to each pen point, until you have five spokes. Tape off the opposite end onto the back of the chipboard circle.


This is what it will look like from the front side, where you will be working:


Cut several thin (1/4”) strips of your fabric. The tension you use while creating the flower will determine how many strips you need. I cut four, but ended up only needing three of them. Slip one end of a fabric strip into the center hole and tape or glue off on the back to secure.


Fold a thin piece of scrap cardstock over the other end and staple it in place. This will act as a sewing needle for your strip:
 

Begin winding the fabric strip around the spokes, going under one spoke, skipping the next, under the next spoke, and so on. Allow the strip to twist for added dimension. The looser your tension, the fuller the flower will be. Here’s what it will look like at the start:
 

Continue “sewing” the strip in and out of the spokes. When you reach the end of one strip, tuck it under the previous row with glue, then glue the end of a new strip in the same spot. Staple another piece of cardstock to the other end of the strip and continue on.


After two strips of fabric:


And the completed spider rose:


Top off the flower with a button and add to the front of a card. You’re done!


Friday, April 6, 2012

"Create Today"


Looking for some inspiration?!?!

Scrapbook & Cards Today has a fabulous series of videos called Create Today.

Be sure to pop by their You Tube page and check them out.

Wednesday, March 21, 2012

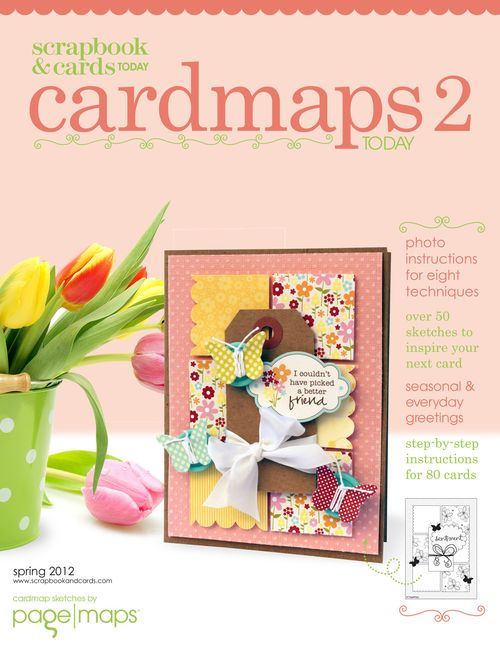
CardMaps 2 is here!!

Now here and on the shelf......


Get yours today!!


Tuesday, January 10, 2012

Are you registered.....


...for S&CT Crop & Create Markham?

Join us for two days of inspiration, education and fun! Come crop and create with some of the best teachers in papercrafting. Join Becky Fleck from PageMaps, Vicki Boutin, Kelly Goree, Angela Urbano and card-making expert Sarah Hodgkinson for fabulous classes that are full of tips, tricks and techniques for every level. With 24 hours of cropping time, a chocoholic feast, fabulous prizes, make n’ takes and so much more, this exclusive event promises to be a weekend all about creating with our closest friends…and one that is not to be missed!

There are only 25 seats remaining for this fabulous event and it's just a month away! We are so excited to be an on-site vendor for this event and want to make you a special offer. We will give you a $10 gift certificate to be used in our on-site store when you register for Crop & Create Markham between December 13th and January 10th! All you have to do to qualify is once you have registered, send an email to create@scrapbookandcards.com letting them know that Scrapping Turtle sent you, it's just that simple! And when you arrive at then event, you will have a $10 gift certificate waiting for you at the registration table.

So what are you waiting for!?


Saturday, December 17, 2011

Inspiration from the Blogosphere!
I just wanted to share this tutorial with you that I found over at the Scrapbook & Cards Today blog.

Accordian fold Mini Album


I had intended to do a basic tutorial on making an accordion fold mini album, but I thought I'd incorporate the idea of doing a monthly "Currently" into the project as well. I've made this album twelve pockets large, perfect for on "Currently" sheet and photo each month. At the end of 2012, I'll have a snapshot of me throughout the year.


First off, you'll want to score a 12x12 piece of cardstock into thirds (at 4 inches and 8 inches), then you'll cut that 12x12 in half, so you have two 6 inch pieces. Fold them accordion style and glue together by overlapping two of the flaps. A 12-pocket album will use six–6 inch strips glued together.


Once your accordion is glued together, cut twelve 3 " x 4" rectangles and punch a half hole on one of the 4 inch sides. Then glue a rectangle to the right side of each two page spread. To get all twelve, you'll also be using the back of the accordion to house your pockets and photos.


I then printed off the questions and cut them into 3" x 4" rectangles. I also cut up a sheet of calender bingo cards from the Year•o•logy collection from Simple Stories (all patterned papers and stickers are from this line). I slipped the questions and the calendar in the pocket. When I answer my questions, I'll circle the date on the calendar, clever, no?


The final step is adding the cover. I cut a 6" x 12" piece of paper, scored it at 4.5" and 8.5" then glued the back page of the album to that scored part. Then I scored at 3.5" and 9.5" so the cover would fold up and around the accordion.


Decorate as desired, you can add a ribbon to hold it all together if you'd like. And there you have it, an accordion mini album, waiting to be filled.


Friday, September 23, 2011

The fall issue is here!


Available today is the Fall issue of Scrapbook & Cards Today. 

Stop in today to pick yours up (wile quantities last)!

Saturday, August 13, 2011

Organizer Tutorial

My surfing has paid off again!!  I have found another project that I would like to show off!

____________________________

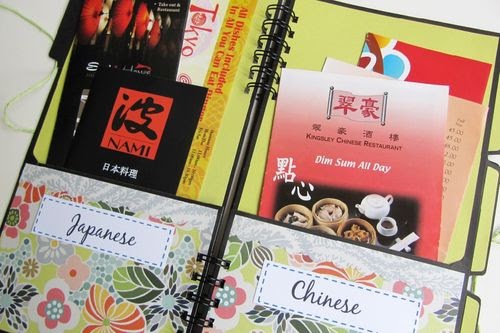
I found this on the Scrapbook & Cards Today blog.  Virginia created it as an organizer for take-out menus but I think the idea is fabulous and could be adapted to pretty much any type of project!

Menu Organizer Tutorial

by Virginia Nebel


Hello! Do you have a drawer in your kitchen or home office that becomes a dumping ground for all things miscellaneous? In my kitchen, I have a drawer filled to the brim with ‘stuff’ like takeout menus, recipe clippings, flyers, etc.

Today I’d like to share with you how I made this Take-Out menu album organizer. All you need are some office folders with pockets, pattern paper and embellishments.


I used three double pocket folders from Staples, they are inexpensive and come in many colours.

Take each folder, measure from the right edge and trim it to 6 ¼ inches wide. Tip: if your trimmer cannot cut through the double thickness of the folder, open up the folder and trim each pocket page individually.

You will end up with two pieces from each folder and the open end each pocket page is on the spine side of the album. Save the scraps from the file folder cuts to punch out tabs. Adhere tabs along the side of each pocket page before adhering your pattern paper.


In my example, I chose to use pattern paper on both the outside and inside of the panel pages.

On the inside panel pages, I used 2 papers- the top portion measures 6 x 7 ½ inches and is tucked just under the pocket. The lower portion measures 6 x 4 ½ inches. If you are using a different brand of pocket folders, these measurements may vary.

Raid your stash and use up all that beautiful paper and trims you have.


Supplies: Staples pocket folders, K& Co pattern paper, Sizzix and Lifestyles diecuts, Zutter binding machine.
 
Lastly, I bound the album organizer with the Zutter Bind-it-all. I love that all my ‘stuff’ is neatly filed in this organizer. Take-Out has never been so easy! You can make all sorts of different themed organizers- think recipes, school schedules, inspirational clippings from your favourite magazines etc.
 

Saturday, June 25, 2011

Printing on a journaling tag tutorial!

I came across this fabulous tutorial on the Scrapbook & Cards Today blog and with their permission I thought it would be great to also share here. 

Credit goes to Paula Gilarde for this.


I usually use the computer to add my journaling - often strips, or journaling blocks but I also like to use journaling spots or tags. It can be a little trickier to add journaling using a computer to them but it's not impossible! Here's a few tips that I use:

First I measure the size of my journaling space -- in my example on this Jillibean Soup tag, the journal block is about 2 inches wide x 3 inches high.


I create a standard document in Photoshop (or Elements) - 8.5x11in, 300 dpi, and turn Grid on (View, Grid). Then I draw a text box of 2x3 inches using the Horizontal Type Tool (T) - this is where having the grid turned on is useful.

Next I see how many lines my journaling will have -- this is determined by the journaling tag. In this case there are 11 lines. I type 11 lines of text into my text box. Initially the text probably isn't going to fill your text box but we can fix that, just make sure you are setting you text size to the one you want (usually around 10/11). Play around with the leading to get the text to fill the box - that's the option that looks like an A on top of another A. Remember, you can type a number into the box, you are not limited to the numbers in the drop down list.


I like to do a test run on a regular sheet of printer paper then to make sure that I've got my size and spacing correct. Hold the journaling tag over the printed journaling to check -- I do this at window so the light shines though, you can also use a light box.


Next adhere your journaling tag on top of your test journaling using re-positionable adhesive and send it through your printer again.

Viola! Perfectly aligned journaling on a pre-printed tag!

Friday, June 24, 2011

Look what's here.....


The summer issue of Scrapbook & Cards Today is here!!!!

Get yours today (while quantities last)!

Friday, March 25, 2011

Scrapbook & Cards Today

Today is the day!!  A new issue of the very fabulous Scrapbook & Cards Today magazine is available in the store.  One FREE with a purchase while supplies last!!


 Also available for purchase is the brand new Cardmaps Today book!  I haven't had a chance to see it yet but I hear it is fabulous!!

Monday, January 10, 2011

Crash Your Stash with project 12


Are you ready to get more scrapbooking done in 2011? I know I am! We are re-introducing Crash Your Stash, and this time with Project 12!

If you are unfamiliar with Project 12, it is a challenge that Scrapbook & Cards Today Magazine started last year. Each month they release a sketch, created by Becky Fleck, to inspire you. It's a great way to get a jumpstart on your scrapbooking. You can use the sketch each month as a "month in review" type project so that at the end of the year you have a terrific keepsake.

We are going to incorporate Project 12 Sketches into our Crash Your Stash classes! Each month you will create 4 pages (either 2 double pages or 1 double page and 2 single pages) inspired by the Project 12 Sketches. Better yet, you bring supplies product from your own stash! This way, the projects will always be with products of your own taste and it helps you use products you already own. You will leave class with a very personalized project that isn't cookie cutter to everyone else in the class. You can stretch your supplies and your dollar by using your supplies to create multiple layouts that you can then use as gifts! (Just think, you could have a whole year in review album to give to grandparents at Christmas!)

These classes are great for all levels of scrapbooker! It's great for beginners to learn new techniques, paper combination, photo placement, as well as learning how versatile and useful sketches are. It's great for advanced scrappers to use their abundant stashes, be inspired to get more pages done and making their products go farther and a great social night out!

Crash Your Stash with Project 12

Intro Class: Wednesday January 19th, 7-9pm
Monthly Classes: 2nd Wednesday each month, 7-9pm
Cost: $12 per class

Special Promotion: Sign up for the whole year of Crash Your Stash with Project 12 for only $99!

Sign up and pre-pay for the year by January 15th and get one American Crafts 12"x12" D-Ring Album* for only $15! You'll need an album for all of your completed layouts!
*excludes leather albums